[How-To] Running your own Web Server for Marketers – Part 1
Published on
Time to Read: 11 minutes
I’ve put this series together as an intro to web hosting. While there are quite a few guides out there on this topic, this one is from the perspective of not only a server admin but an SEO as well. I will detail decisions and configurations in respect to optimizing your server for SEO. Over the course of a series of guides I will cover a wide range of helpful topics. Including web host configuration, WordPress installation, optimization, advertising, and more.
The first part of this guide will cover ordering a server, updating, securing, and installing a control panel to simplify future tasks. A basic understanding of Linux and it’s commands will help but are not required to follow along. Let us jump in!
Getting Started – Picking a Hosting Provider
A great resource I’ve used often is LowEndBox (https://lowendbox.com) – this is a collection of VPS special offers in various locations. You can read reviews/feedback from clients of each service and pick one that is suitable for you. Amazon’s AWS EC2 is another great option for web hosting that offers a variety of services all under one ecosystem, including storage for backups (S3), DNS hosting, email services, and other features. Using AWS requires a few different approaches for setup to tie the services all together which will not be covered under this guide.
Two providers I’ve used for many of my project are BuyVM and RamNode. I’ve been with both providers for 6+ years and have nothing but high praise for their support and uptime. Whatever you choose, make sure to check customer feedback and that they have a location ideal for your website.
Before rushing off to order a VPS, take a quick look at your business’s demographic location. If you’re a USA based retailer with shipping all over the US, you may want to choose a central location e.g Chicago. Meanwhile, a mom and pop shop based in NYC will do best with server hosting in New Jersey or NYC. If your business is located in Europe, then Netherlands and Germany are two very popular geographical hosting locations with many provider options.
Serving your website from a location near your main client base will help with keeping your website feeling snappy. Faster page loading speeds not only help your Search Engine Optimization but overall user experience as well.
If your business serves customers worldwide, pick your main market and look into using CDN solutions such as CloudFlare to host demanding files (CSS/Images/Scripts) on cache servers all over the world.
Whats Under The Hood? Picking The Right Specifications
You need a lot less server power than you think. For a single small WordPress site, 1GB of Ram and 1-2 CPU (2.3ghz+) cores is more than sufficient. Medium traffic sites and if you plan to self-host your email then 2GB of ram and 2 CPU (3.2ghz+) cores is recommended. If you have very high volumes of traffic, I recommend speaking to a hosting provider to find a suitable plan for your business. High volume gets more complicated with need to load balance visitors and is beyond the scope of this guide.
Hosting with SSD is CRITICAL
When it comes to hosting options, it’s critical your VPS is hosted on a Solid-State Drive (SSD). For websites that serves a lot of pages, scripts, and images, the decrease in load times is significant compared to traditional HDDs.
Faster Webpage Loads = Increased User Experience (and most likely better rankings)

This is a lengthy topic with quite a few pros and cons for each, so I’ll keep this short. For the average user, OpenVZ is a perfectly cheap and suitable option. The system resources on a host using OpenVZ are shared across the entire server, this means it makes a best effort to provide you with the performance you ordered. If you require more system customization and guaranteed resources (RAM, CPU, SSD) then KVM is your better choice. KVM is recommended for medium and larger sites.
For the purposes of this guide, we will be using a simple OpenVZ VPS.
For the purpose of this guide, we will be using Debian 9.0-x64 (Minimal). You may not see this as an option when you first order the server, but you can most likely select this as one in the control panel after the server has been setup. Reach out to the host provider to confirm availability before ordering if you’re unsure.
- Why Minimal Install? The server starts with only the absolute essentials needed and cuts out the fluff.
Advanced Users: Any Debian distro (e.g Ubuntu Server) is suitable for this guide moving forward - Recommended to use minimum installs
When ordering a server you’ll be asked for a hostname or FQDN (Fully Qualified Domain Name). In short, this is an identifier for your server, keep this simple: s1.yourwebsitename.com
If you plan on sending e-mail from this server (which I will cover in a later guide), I recommend setting the hostname either as stated above or as the main domain you will be emailing from. The hostname will be visible in the source of emails you send from this server.
For a more advanced understanding of hostnames read here: https://www.systutorials.com/docs/linux/man/1-hostname/
Configuring Your New Web Server
OK, You’ve ordered and the VPS is up and running… Now What?
Once your order has been accepted, you’ll typically receive an email with your login credentials with a few minutes. This is assuming the provider you picked as Instant setup for their virtual servers, which most will have.
With these login credentials, you’ll need to use an SSH client to connect to your new server. On Windows you can use PuTTY (https://www.putty.org/), or if you’re running Linux already you can connect from a terminal. e.g ssh -u root your.Server.IP.address
Upon logging into your new server, the most important first step we make is updating and upgrading your system. We will first update the list of available updates, and then upgrade any available packages. This is handled with a simple command entered into your terminal window:
apt-update && apt-upgrade
Useful Utilities
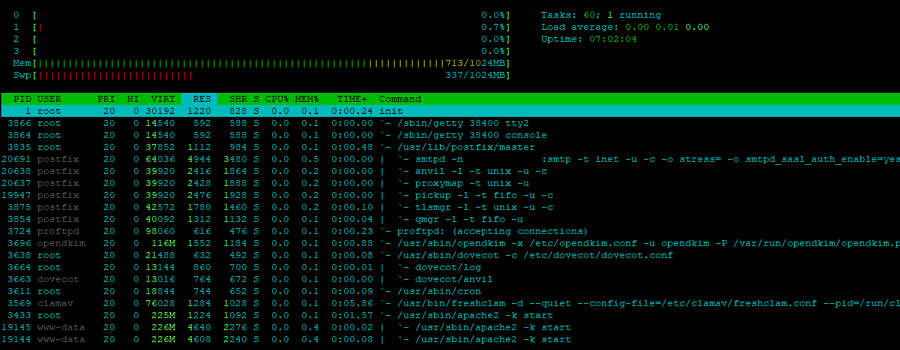
There are quite a few useful programs/utilities to make our lives easier with Linux server administration. I’ll keep it simple and list two that I install every single time Nano (text editor) and htop (task viewer). Go ahead and install those now using the following command:
apt install nano htop
Server security is a vast topic outside the scope of this guide. What we will cover are the very basics to protect you from the majority of any attacks on your system. I HIGHLY recommend spending a little time after finishing this guide reading on steps you can take to further secure your system.
Protecting SSH
The most common of attacks are brute forcing your SSH login. If an attacker gains access to your root account, they have control of the entire kingdom. By default SSH uses port 22 for all connections, so to help mitigate the majority of attack attempts we will change the port it listens for connections on. Lets quickly make that change now:
Keep in mind, once your change your SSH port you will need to use this for all future SSH connections to your server.
Open the SSHD configuration file in nano
nano /etc/ssh/sshd_config
With the configuration file open, locate the following line
# What ports, IPs and protocols we listen for
Port 22
For the purpose of this guide, we will change Port 22 to Port 41414. Once you’ve changed this, close and save the configuration. To save with Nano, use the following steps (remember this moving forward it’ll be assumed you know how):
- Press Ctrl+X, Type Y to confirm changes, Press Enter to save the file
Restart SSHD to use the new configuration, we will also check the status to confirm everything is OK
service sshd restart
service sshd status
The status should read out that the process is Active (Running) and towards the bottom display our new port number e.g sshd[11283]: Server listening on 0.0.0.0 port 41414
Installing Fail2Ban
Fail2Ban is a utility that will help prevent brute force attacks on your server via SSH. If an attacker should fail to login after X amount of attempts, they will be automatically blocked from further server connections. This not only helps protect your server from unauthorized entry, it will cut down on traffic load from repeat failed attempts. We can install and configure this easily:
Install Fail2Ban
apt install fail2ban
Configure Fail2Ban to listen on our new SSH port by creating a new configuration file
nano /etc/fail2ban/jail.d/jail-debian.local
With the new file open, add the following lines. Note: Remember to use the port you assigned in the previous step
[sshd]
port = 41414
maxentry = 5
Save the file and exit nano. We will now restart Fail2Ban and check its status
service fail2ban restart
service fail2ban status
All set! Keep in mind, this also affects you if you should fail to login 5 times in a row. By default you will be banned for 600 seconds until you can attempt again. In any case, if you are locked out of your server you can use the control panel from your host provider to access the server with a console connection.
Installing a Firewall
We will install a firewall to protect from any unwanted connections to our server. When it comes to Linux software firewalls you have two popular options – Uncomplicated Firewall (UFW) and ConfigServer Security & Firewall (CSF). Firewalls are a complex topic and require quite a bit of knowledge to administrate properly. For the purposes of this guide we will keep it VERY simple and use UFW. Lets install UFW now and configure it for use with the following commands:
Install UFW
apt install ufw
Deny Incoming Connections and Allow Outgoing
ufw default deny incoming
ufw default allow outgoing
Allow SSH Connections – Remember to use the SSH port you defined earlier (in this case, port 41414) Important: Do this before enabling the firewall so we can still access the server
ufw allow 41414
Enable The Firewall
ufw enable
Check the status of the firewall, making sure its working
ufw status verbose
Our firewall is now configured and working. Later on you will need to allow some additional ports for HTTP/HTTPs, Email Services, and a few others. This will be explained as we approach them.
Basic Security and Further Reading
The above steps are only a few of the measures you can take towards protecting your server. The changes we have made so far will stop the vast majority of attacks, and outside of critical software flaws make very difficult to attack. One additional step I would recommend to further secure you server would be to disable ‘root’ user login and require a keyfile to access the server instead of passwords. This is outside the scope of the guide, but you can find a detailed explanation on how to do this here: How to Setup SSH Keys
Control Panels – Making Our Lives Easier
To simplify a lot of tedium and configuration, most web hosts use a control panel. This saves us the time from manually configuring various files and puts everything into a neatly organized user interface. When it comes to server control panels, there are quite a few free and paid options. The one I’ve used for many years and works perfectly for all my needs is Virtualmin (https://github.com/virtualmin) an open source and completely free option.
Two popular commercial options are Plesk and cPanel – both are outside the scope of this guide.
Installing Virtualmin is a very straightforward and quick process. The example we will use here is for a full install which includes the components for receiving and sending emails from the server. Lets proceed!
We will change to the home directory, download the Virtualmin install script, enable execution, and finally execute the script to install
cd ~
wget http://software.virtualmin.com/gpl/scripts/install.sh
chmod u+x install.sh
./install.sh
Note: For servers with less than 512MB of RAM, or if you will not be hosting e-mail on the server at all you can use the minimal installation by using: ./install.sh –minimal You may be asked a few questions during installation. If your system does not have a FQDN / hostname (what we set when ordering the server: s1.yourwebsite.com) you will be asked to enter one. After a few minutes the installation process will finish and we can continue to configure the new control panel to fit our needs.
Accessing Virtualmin
We’ll now cover the steps of accessing our freshly installed Virtualmin control panel.
First, we will allow access to the panel through our firewall by opening port 10000
ufw allow 10000
Second, we will access the control panel using a browser by going to: https://your.Server.IP.address:10000
Ignore the SSL certificate error and add an exception for now, this is a temporary self-signed certificate. We will replace this with a valid certificate as we finish the configuration. From here we will login to the ‘root’ account with your password.

What’s next? Configuring Virtualmin – The Basics
Webmin/Virtualmin is a very powerful piece of software. There are thousands of settings we can tweak and modify to fit all needs. In the next part of the series, we will cover the basic configurations of Virtualmin required for setting up a fully functional WordPress site. If you have any questions or feedback, please leave a comment below.
Take a break, you’ve earned it! Part 2 of the series will be arriving soon…
If you would like to be notified when the second part of our series goes live, please sign up to our newsletter below:
Join our community of thousands of members and receive the latest updates on SEO/Marketing and special deals on our line of services.